Tuesday, March 20, 2012

What I wore today

So, I am having a hard time getting good pics on the timer.  Please bear with me as I learn!  I know these are over exposed.  I'll figure it out eventually.
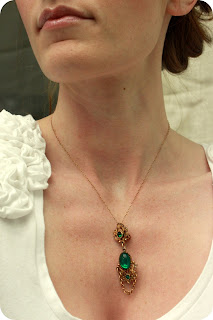
Sweater: Banana Republic, Skirt: thrifted and re-styled, Boots: Chinese Laundry, similar here, Belt: Totally don't remember, Necklace: A gift!

Monday, March 19, 2012

Songs that "get" me

You know that song?  You know, the one where the whole world around you stops and you are completely absorbed by the sound of the song?  No matter what is going on, you could just, I don't know, cry?  It's dangerous when you think about it, really! I thought I would share some of the songs that have that effect on me.  They are all totally random, but they just get me.
"High and Dry" by Radiohead.  This is my long-time, all-time favorite song.  Not sure what it is, but it gets me every time. Everything is alright in the world when I hear this.

"Loro" by Pinback.

"The Only Living Boy in New York" by Simon and Garfunkel.  Ahhhh, I love this.


"Save a Prayer" by Duran Duran.  I told you these were going to be totally random and out of nowhere guys. I had never actually watched the music video until now.  The 80's were great.  This video is full of slow-mo, aerial views, and singing while gazing out of billowy curtains.  Epic?

"Company Calls Epilogue" by Death Cab for Cutie.  I got to see this one performed live, and I cried.  I cried at a concert.  It was very silly, but I loved it.

"A Day in the Life" The Beatles.  Favorite Beatles song, period.

I'll stop here, before this gets out of hand.  I could go on.  And on.

Love Jenn xoxo

Clip on earrings - 7 ways to wear them

I love clip on earrings, I have been collecting them for years.  What do I love about them?  Not to mention that vintage earrings can be to die for adorable, there are so many ways you wear them.  Clip on earrings aren't just for ears anymore boys and girls!  Here are a few ways I like to wear mine.
On a headband, or clipped in your hair.
Clipped to a scarf (another thing I have quite a collection of!)
Wear them as a necklace!
I love this, clip 3 earrings to a chain to make a one of a kind pendant.
Wear them on your tank this summer (Bonus: holds your bra straps in place!)
Wear them on your shoes!  I also like to clip them near the toe.
I know what you're thinking.  "How does she store all of these darling earrings?"  Well, here ya go.  I made this earring holder about a million years ago.  Now I have made 3 different kinds for earrings alone.  We won't even talk about all the other jewelry....

So, do you have any unique ways that you use clip on earrings??  I'd love to know!

What I wore today

These pictures are on a timer and a tripod, so they aren't amazing.  I guess I will learn as I go!  This is one of my favorite vintage skirts.  It's a wrap skirt, and I love the high waist.  I wear it more than I probably should.  It is so drizzly outside today, I will be spending the rest of the day huddled inside my warm house!
Shirt: H&M, Skirt: Vintage, Shoes: Seychelles ( and about a hundred years old )
On another note, Amos and I will be laying on a beach in Mexico in the near future.  I was trying to be good and lose a couple.  But then this called my name.  I am hopeless.....

Love Jenn xoxo

Thursday, March 15, 2012

Cucumber Basil Martini


Spring is coming!  I am ready, are you?  To get us in the mood (like we needed any assistance!) I thought a fresh cocktail was in order.  Try this Cucumber Basil Martini, I think you'll love it!

You need:
-2 oz. Vodka
-1/4 oz. Lemon juice
-2 Slices Cucumber
-4 Leaves of Basil
-1/2 oz. Simple Syrup (super easy to make, here's a recipe)

Muddle 3 leaves of basil and your 2 slices of cucumber in a shaker.  Add the liquid ingredients to your muddled concoction.  Shake over ice.  Pour in Martini glass, and garnish with a lemon wedge and basil leaf.

Now, go lay out on your hammock, and enjoy the day with your martini.  Go ahead!

Wednesday, March 14, 2012

DIY Brush Protectors


I saw Brush Protectors featured in Real Simple Magazine, and I thought they were a great idea!  When I travel by plane, I can't take my makeup box, so I have to down size and throw a few things in a bag.  This is not so great for my makeup brushes.  They look pretty haggard by the time I am unpacking at home.

So, you can buy a set here at Sephora for $8, which isn't a bad price, or you can make your own for literally pennies!  Here's how.
At your local fabric store, you can buy nylon net, which is like tulle, only the "holes" are bigger and the material is stronger.  There is a bit of stretch to it, which is perfect for this project.

You will need:
-Nylon net (your choice of color!  I chose black, but they have white, red, pink, etc.)  You'll only need a foot, which will leave a lot of leftover material, and only cost me $0.32.
-Needle
-Thread
-Scissors
-Thin ribbon (optional)
1.  Wrap net over your brush, and make a snip where there is about a half inch of overlap.  Continue to cut along that snipped line.  Cut a rectangle that will go about halfway down your brush.

2.  Fold over the net and stitch along the edge to create your cylinder.  Once stitched completely from tip to tip, turn in right side in (or inside out?).

3.  That could have been the end of the project for you.  I thought it would be fun to add a little ribbon to the tip of my brush protector though!  I weaved the ribbon through the very top of the netting.


That's it!  When you are ready to use, you slide the base of your brush through the top of the protector, then slide it up over the brush.  If you used a ribbon, you can now tie you bow!

Thanks for stopping by!
-Jenn

Tuesday, March 13, 2012

For the Love of Etsy

I thought I would share some of my favorite things from Etsy.
I love this little plush bunny from Oh Honey Child.  All of her things are too cute!

I think I may need to buy this print from Peggy Wolf Design.  It's a steal, and it is strikingly beautiful.

This kills me.  I love it so so so much!  I am positive that none of my feline friends would tolerate this hat for a second though.  Everything in this shop is adorable, check it out CatAtelier.

Wouldn't this make the perfect wedding present?  Personalized salt and pepper shakers.  Send in photos, and this lovely artist will paint personalized pictures on your shakers of the couple of your liking.  Fantastic idea!  Take a look at Joy Nevada now!

I sort of love faux taxidermy.  I am not really a fan of real taxidermy (don't hate me if you love it).  This resin deer head would definitely be the conversation piece of any room, don't you think?   Banana Tree Studios.

One more.  I love the style that of this artist's gouache paintings.  Especially this one, I think it is so sweet.  This artist is in Madrid, which is something I absolutely love about Etsy, you can buy beautiful handmade things from around the world.  Blancucha.

That'll do for now.  Oh, and while you are at it, check out my Etsy shop too Sadie Wade & Co.!  Have a lovely day!
 Thanks beautiful! -Jenn

The "F" Word (it's not what you think!)

So, I really wanted to hit the ground running with my new blog.  Then it happened....  I got the flu.  I haven't had the flu in years, so I was pretty pathetic.  On a happier note, it snowed and snowed last night.  About midnight, my hunny and I realized it was snowing, like, flakes the size of quarters snowing!  I live right on the Oregon coast, so snow here is a rare treat!  Although Amos had to work in the morning, and I wasn't feeling 100% yet, we decided to take advantage of it.  We made a snowman, with broccoli buttons, and made a snow angel in the middle of our street.  We went for a long walk, and went sledding with trash can lids. Then we came home and had maple syrup (Amos) and peppermint schnapps (me) poured over snow, and watched the snow fall.  Oh, and we introduced all of the kitties to the snow.  None of them were thrilled.  So, by 2:30 we were back in bed with a cup of tea.  Today, I am sickly again, but it was all so worth it.


Thanks beautiful! -Jenn

Saturday, March 10, 2012

My Happy Little Family...

If I am going to have a blog, I should introduce you to my family, no?  This is my husband Amos.  Isn't he cute??  He is the best!  We met in 2005, at Sbarro's, of all places, through mutual friends.  So romantic!  We had a small (17-in-attendance-small) park wedding in October '06, and have been living happily ever after since!  I have never laughed so much in my life you guys, Amos is so perfect for me.  He is the peanut butter to my jelly, the Ricky to my Lucy, the Gin to my tonic!  Love him.  Enough with that.

I grew up in the Bay Area in California.  I loved it there.  When I married my hunny, I moved to the Oregon coast.  It is so lush and beautiful here.  The culture is so different than what I was used to, less shopping, more trees.  But I have amazing friends that make it perfect.  I live literally minutes away from the beach, but I rarely go.  I really need to change that!  

Soooo, I have always had a thing for cats.  So we have three.  And I would totally have more if I wouldn't look like the crazy cat lady (which I already am to my best friend).  I posted some pictures below.  You can be sure that this won't be the last time you see them.  They are kind of  a big deal!  And they are basically our children, until we have human children anyhow.
Sooki
Penny
Bosley
OK, this is not our cat.  He is our neighbor's cat, but he likes to hang out at our house.  We call him Jimmy.  His real name is Oliver.  I know, it's weird.

There is a quick introduction to my little family for you.  Thanks!

text Thanks beautiful! -Jenn

Friday, March 9, 2012

Hammered Metal Necklace Project


Welcome to my very first DIY blog post!  I am so excited to share with you this new project!  This project is fairly easy, it shouldn't take more than an hour.  I love seeing results in a short amount of time, don't you?  Have a looksie....

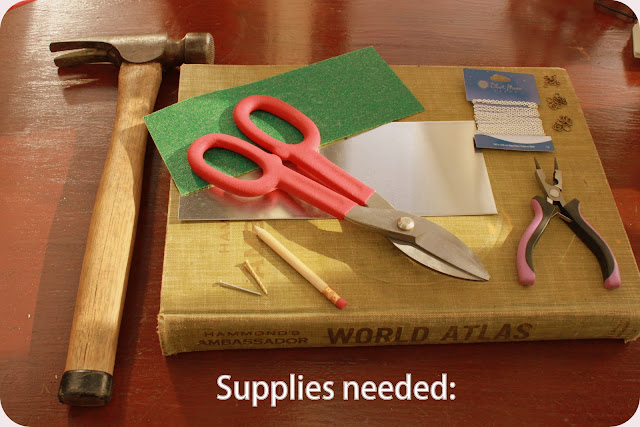
-Hammer
-Small sheet of thin metal (I got mine at the local hardware store)
-Metal snippers
-Coarse sandpaper
-Couple of smallish nails
-Jewelry pliers
-Jump rings, I used small, medium, and large ones (where jewelry making supplies are sold)
-Necklace chain (see above)
-Necklace toggle (not pictured, oops!)

1.  Measure out two rectangles on your sheet of metal.  I measured out 1/2 inch x 1 1/12 inch.  Cut them out, carefully, with metal snippers (You should use gloves when handling the metal, it has sharp edges after all.  I can't say that I did.  Whoops!).

When you cut the metal, it will bend out of shape.  That is ok!
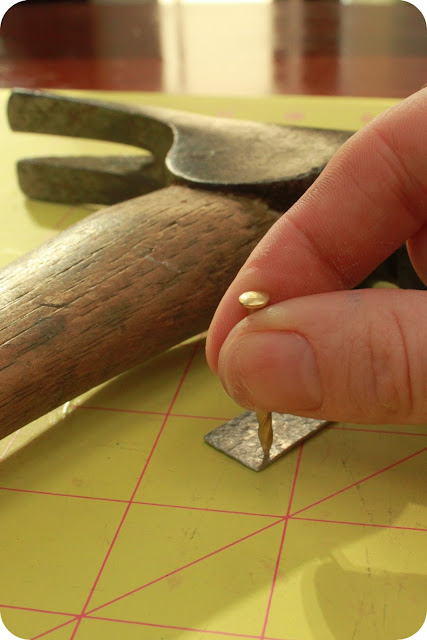
2.  Hammer the entire surface of each side of the metal.  This step I did on a thin piece of cardboard on cement flooring.  Continue to hammer until you are happy with the look.  **Important** Sand the edges and corners with your coarse sandpaper.  The edges are sharp! and we don't want to scratch up your chest, now do we?!
3.  You need to hammer small holes near the edge of the metal.  It is up to you where you want the holes to be, and where the pieces will be connected.  I made small holes near the corners.  Hammer in the desired spot, turn the piece over, and hammer in the same spot on the other side.  Continue to work with the nail and hole until you have the desired size hole.
On one metal piece, you need holes at each corner, and the other you only need to make 2 holes.
4.  Now the fun part!  Open your jump rings and connect the metal pieces.   You can be creative with the colors and sizes of the rings that you use.  I used brass colored rings, which I think looks nice with the silver pendant, and silver chain.
5.  Cut your chain to two 7 inch long pieces (this is what I did, you can make this shorter or longer, depending on the look you want).  Assemble the chain, pendant, and toggle (the toggle is the necklace closure).

Voila!  What do you think?  It is so quick and easy.  I have more of that piece of metal, I will have to see what other pretty little things I can make with it!


-Jenn